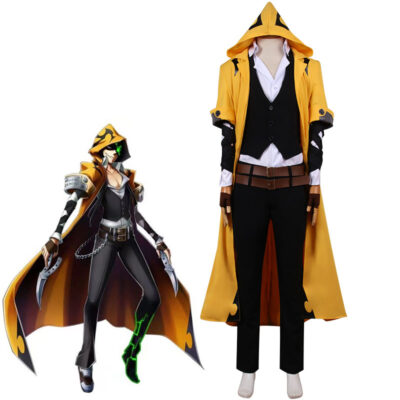
Cosplay is all about bringing your favorite characters to life—and great post-processing can take your cosplay photos from good to unforgettable. Whether you're aiming for cinematic drama or anime-style vibrance, editing helps highlight your hard work and creative vision. Here's how to make your cosplay photos stand out with post-processing:
Before editing, ask yourself:
This will help guide your choices in color grading, lighting effects, and background edits. Reference the original source material—like anime screenshots or game concept art—to stay true to the character's universe.
Start with simple tweaks to enhance your base photo:
These steps create a clean base before diving into more artistic edits.
Color grading helps match your photo to the world your character belongs to. Try:
You can use tools like Lightroom or mobile apps like Snapseed to adjust hue, saturation, and luminance for each color channel.

Enhancing with digital effects can truly make your cosplay pop. Popular examples include:
Use Photoshop, Photopea, or even mobile apps like PicsArt and Afterlight to layer in effects subtly.
Sometimes a distracting background can steal attention from your cosplay. Consider:
Be mindful of lighting direction and shadows to make the composite believable.
Keep it natural—don't over-smooth your skin to the point of plastic. Instead:
Tools like Frequency Separation in Photoshop can help retain realistic skin texture.
Read More: A List of Cosplay Props Weapons, Wigs, Contacts and More
Not everyone wants to use Photoshop. Try:
Always keep a backup of your unedited photo in case you want to try another style later!
The best edits enhance your cosplay without overpowering it. Avoid over-saturating or using too many effects unless it's clearly stylized. Let your costume, pose, and expression shine through.
Read More: How to Clean & Maintain Cosplay Costumes
Post-processing is an art form that complements your cosplay. By thoughtfully adjusting lighting, color, and effects, you can create photos that feel like stills from a movie—or straight out of an anime scene. Practice different styles, study edits from other cosplayers, and most importantly, have fun turning your photos into true pieces of art.
1. Start with a Clear Vision
Before editing, ask yourself:
- What mood or story are you trying to tell?
- Is this a fantasy world, a sci-fi battlefield, or a peaceful slice-of-life scene?
This will help guide your choices in color grading, lighting effects, and background edits. Reference the original source material—like anime screenshots or game concept art—to stay true to the character's universe.
2. Basic Adjustments Are Your Foundation
Start with simple tweaks to enhance your base photo:
- Exposure & Contrast – Make sure your photo is bright enough and has dynamic contrast.
- White Balance – Correct any strange lighting so skin tones and costume colors look accurate.
- Sharpening & Clarity – Bring out the details in your costume, props, and makeup.
These steps create a clean base before diving into more artistic edits.
3. Color Grading Sets the Tone
Color grading helps match your photo to the world your character belongs to. Try:
- Cool tones for dystopian, sci-fi, or moody characters (e.g. Tokyo Ghoul, Attack on Titan)
- Warm tones for romance, school-life, or historical anime (e.g. Your Name, Fruits Basket)
- Vibrant saturation for action and shonen-style shots (e.g. My Hero Academia, Naruto)
You can use tools like Lightroom or mobile apps like Snapseed to adjust hue, saturation, and luminance for each color channel.

4. Add Effects to Match the Genre
Enhancing with digital effects can truly make your cosplay pop. Popular examples include:
- Glowing eyes or energy auras for supernatural characters
- Lens flares or sparkles for magical girl edits
- Rain, smoke, fire, or fog to add mood and depth
- Bokeh overlays for dreamy or romantic scenes
Use Photoshop, Photopea, or even mobile apps like PicsArt and Afterlight to layer in effects subtly.
5. Background Cleanup or Replacement
Sometimes a distracting background can steal attention from your cosplay. Consider:
- Blurring the background slightly to create depth of field
- Removing clutter or bystanders using healing or clone tools
- Compositing a fantasy background to better match the character's setting
Be mindful of lighting direction and shadows to make the composite believable.
6. Skin Retouching & Costume Polish
Keep it natural—don't over-smooth your skin to the point of plastic. Instead:
- Reduce blemishes or makeup creases subtly
- Clean up costume wrinkles or paint smudges
- Sharpen or highlight detailed armor, accessories, or fabric texture
Tools like Frequency Separation in Photoshop can help retain realistic skin texture.
Read More: A List of Cosplay Props Weapons, Wigs, Contacts and More
7. Mobile Editing for Cosplayers on the Go
Not everyone wants to use Photoshop. Try:
- Lightroom Mobile – for pro-level color grading
- Snapseed – for healing, selective editing, and sharpening
- PicsArt – for stickers, overlays, and creative effects
Always keep a backup of your unedited photo in case you want to try another style later!
8. Less Is More – Don’t Overdo It
The best edits enhance your cosplay without overpowering it. Avoid over-saturating or using too many effects unless it's clearly stylized. Let your costume, pose, and expression shine through.
Read More: How to Clean & Maintain Cosplay Costumes
Conclusion
Post-processing is an art form that complements your cosplay. By thoughtfully adjusting lighting, color, and effects, you can create photos that feel like stills from a movie—or straight out of an anime scene. Practice different styles, study edits from other cosplayers, and most importantly, have fun turning your photos into true pieces of art.
Last edited:
